(This walkthrough works for making pretty much anything glow in the dark)
I saw a Blackberry commercial(1) showing bicycles with glow-in-the-dark deep-V rims and awesome five-spoke wheels (2) a few months back. Being me, I stopped the video frame by frame, found the number 94 on a spray can, traced the can to Montana Cans, browsed through their entire catalogue, found their "Poltergeist" transparent glow spray paint, did some research on bicycles (of which I previously knew nothing about), found a pretty good fixie, and made my own night bike. That simple.
(2)Aerospokes
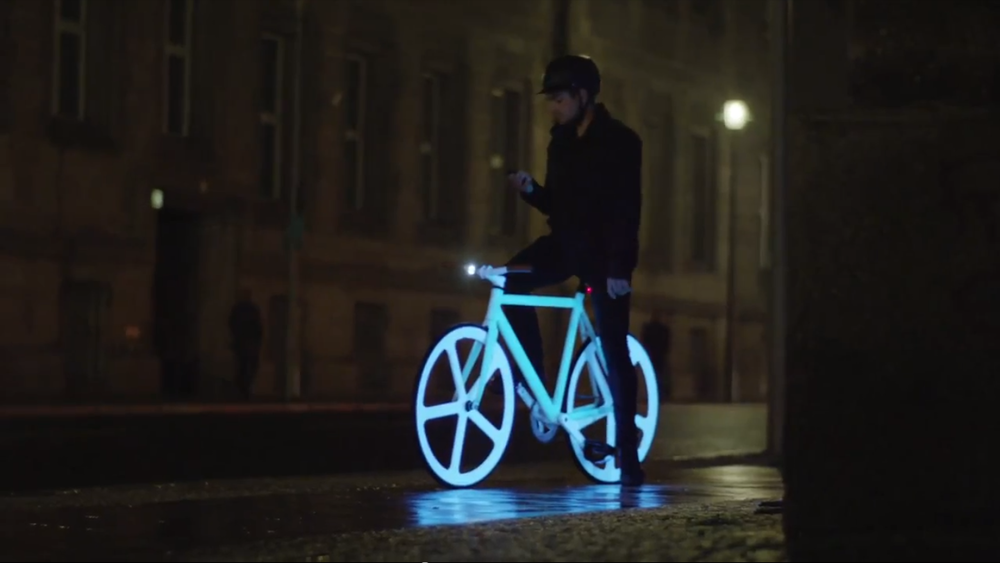
You want a bicycle with glowing Aerospokes too? Well, here's how to modify your current bike to do the same.
I just want to throw out a few disclaimers. First, the glowing in the video is enhanced--apparently, the glowing is not as intense as shown in the video. In my own tests, the trouble was well worth it, though. Also, you can always buy a glow-in-the-dark bicycle from 8bar (update: purefixcycles.com also offers a glow in the dark model now). If you have a deep-V wheel, I highly recommend the Glo by Rimskin. Finally, check out monkey lights before you are sure you want to embark on this project.
The below method is the frugal method and not for the faint-of-heart. Still intent on getting that glow? Here's what you will need (in order of appearance):
- An undying love to investigate and improve things
- Bicycle and proper tools (usually a wrench will do)
- Montana Alien Spray Paint - Poltergeist
Recommended materials (none are crucial, in order of appearance):
- Meticulous carefulness
- Gloves (prevent finger oils from ruining paint)
- Painter's tape (for a clean paint job)
- Acetone or other cleaning agent (nail polish remover will do, removes oil for a good spray job)
- Paper towel/cloth (to douse in acetone)
- (minimum dimensions) 1' long Cardboard tube and 1' x 1' box (to create a stand for your wheel)
- Spray paint primer (possibly a good idea, though I didn't use one)
- Sandpaper (to sand the paint after each layer)
- Half-mask respirator (those fumes!)
- Warm, dry, open environment/hair dryer (helps paint dry faster)
- 2x Knog Beetle Lights for each wheel you paint (recharges the glow as you ride)
- Black-light bulbs (install inside Knog Lights for better effect)
- Sense of fun
There are a million small considerations and suggested methods to take into account during the process, but the general gist of it is:
- Isolate the part to be painted.
Suggestions: dissemble your wheel to paint it, keep the bicycle standing by placing it upside-down, release or dissemble brakes and other complex forms, keep whatever you remove aligned in the order it came off on the ground, I personally think glow-in-the-dark frames subtract from the end result - Cover with masking tape the part that you don't want painted.
Considerations: you don't want to spray any part of the wheel where the brakes touch the wheel--it will cause a horrendous sounding screech every time you brake.
Suggestions: remove the tire by prying it open with a flat object like a cafeteria knife (always dull), don't paint over spokes (unless you have thick five, four, or three spoke wheels)--it won't look good - Spray, dry, sand, spray, dry, sand
Considerations: spray several layers (four or five to be safe), you'll want to wipe down the area to be sprayed with acetone (and wear gloves), sand the area first or applying a primer will help the paint stay on (this usually isn't much of an issue with the spray we are using),
Suggestions: stick a cardboard tube into a box and place the axis of your wheel into the cardboard (works well when painting Aerospokes), spray with the nozzle a distance of 1' away from the surface, wait a day before each layer and use fine sandpaper (e.g. 600-800 grit) to lightly sand before applying another layer,
Also: Black wheels and frames don't work too well without UV Knog lights. If you've wanted a new frame color, this is your chance. The spray is transparent, so you can have a underlying color during the day. Keep in mind that brighter and lighter colors will work better. - Put bicycle back together
Suggestions: if you got those awesome Knog lights like I suggested, install them on the fork so that the light is less than inch from the sides of the wheel and faces the painted parts.This will allow the lights to intensely charge the paint as you ride.
Reflection: I bought a deep-V fixie and single rear Aerospoke from purefixcycles.com to fulfill this dream (medium quality at times, but acceptable and highly affordable). (update: my PureFix was stolen and I switched to State Bicycle for a medium priced fixie--I think they have the best blend of quality and price online). Just assembling and reassembling the bicycle was very rewarding for me. The glow in the dark wheels were very slick, though you really need the UV lights to make it shine.